Isolate cluster nodes
Estimated reading time: 9 minutesThis topic applies to Docker Enterprise.
The Docker Enterprise platform business, including products, customers, and employees, has been acquired by Mirantis, inc., effective 13-November-2019. For more information on the acquisition and how it may affect you and your business, refer to the Docker Enterprise Customer FAQ.
With Docker Enterprise, you can enable physical isolation of resources
by organizing nodes into collections and granting Scheduler access for
different users. To control access to nodes, move them to dedicated collections
where you can grant access to specific users, teams, and organizations.

In this example, a team gets access to a node collection and a resource collection, and UCP access control ensures that the team members can’t view or use swarm resources that aren’t in their collection.
Note
You need a Docker Enterprise license and at least two worker nodes to complete this example.
To isolate cluster nodes:
- Create an
Opsteam and assign a user to it. - Create a
/Prodcollection for the team’s node. - Assign a worker node to the
/Prodcollection. - Grant the
Opsteams access to its collection.

Create a team
In the web UI, navigate to the Organizations & Teams page to create a team named “Ops” in your organization. Add a user who isn’t a UCP administrator to the team. Learn to create and manage teams.
Create a node collection and a resource collection
In this example, the Ops team uses an assigned group of nodes, which it accesses through a collection. Also, the team has a separate collection for its resources.
Create two collections: one for the team’s worker nodes and another for the team’s resources.
- Navigate to the Collections page to view all of the resource collections in the swarm.
- Click Create collection and name the new collection “Prod”.
- Click Create to create the collection.
- Find Prod in the list, and click View children.
- Click Create collection, and name the child collection “Webserver”. This creates a sub-collection for access control.
You’ve created two new collections. The /Prod collection is for the worker
nodes, and the /Prod/Webserver sub-collection is for access control to
an application that you’ll deploy on the corresponding worker nodes.
Move a worker node to a collection
By default, worker nodes are located in the /Shared collection.
Worker nodes that are running DTR are assigned to the /System collection.
To control access to the team’s nodes, move them to a dedicated collection.
Move a worker node by changing the value of its access label key,
com.docker.ucp.access.label, to a different collection.
- Navigate to the Nodes page to view all of the nodes in the swarm.
- Click a worker node, and in the details pane, find its Collection.
If it’s in the
/Systemcollection, click another worker node, because you can’t move nodes that are in the/Systemcollection. By default, worker nodes are assigned to the/Sharedcollection. - When you’ve found an available node, in the details pane, click Configure.
- In the Labels section, find
com.docker.ucp.access.labeland change its value from/Sharedto/Prod. - Click Save to move the node to the
/Prodcollection.
Note
If you don’t have a Docker Enterprise license, you will get the following error message when you try to change the access label: Nodes must be in either the shared or system collection without a license. Get a Docker Enterprise license.

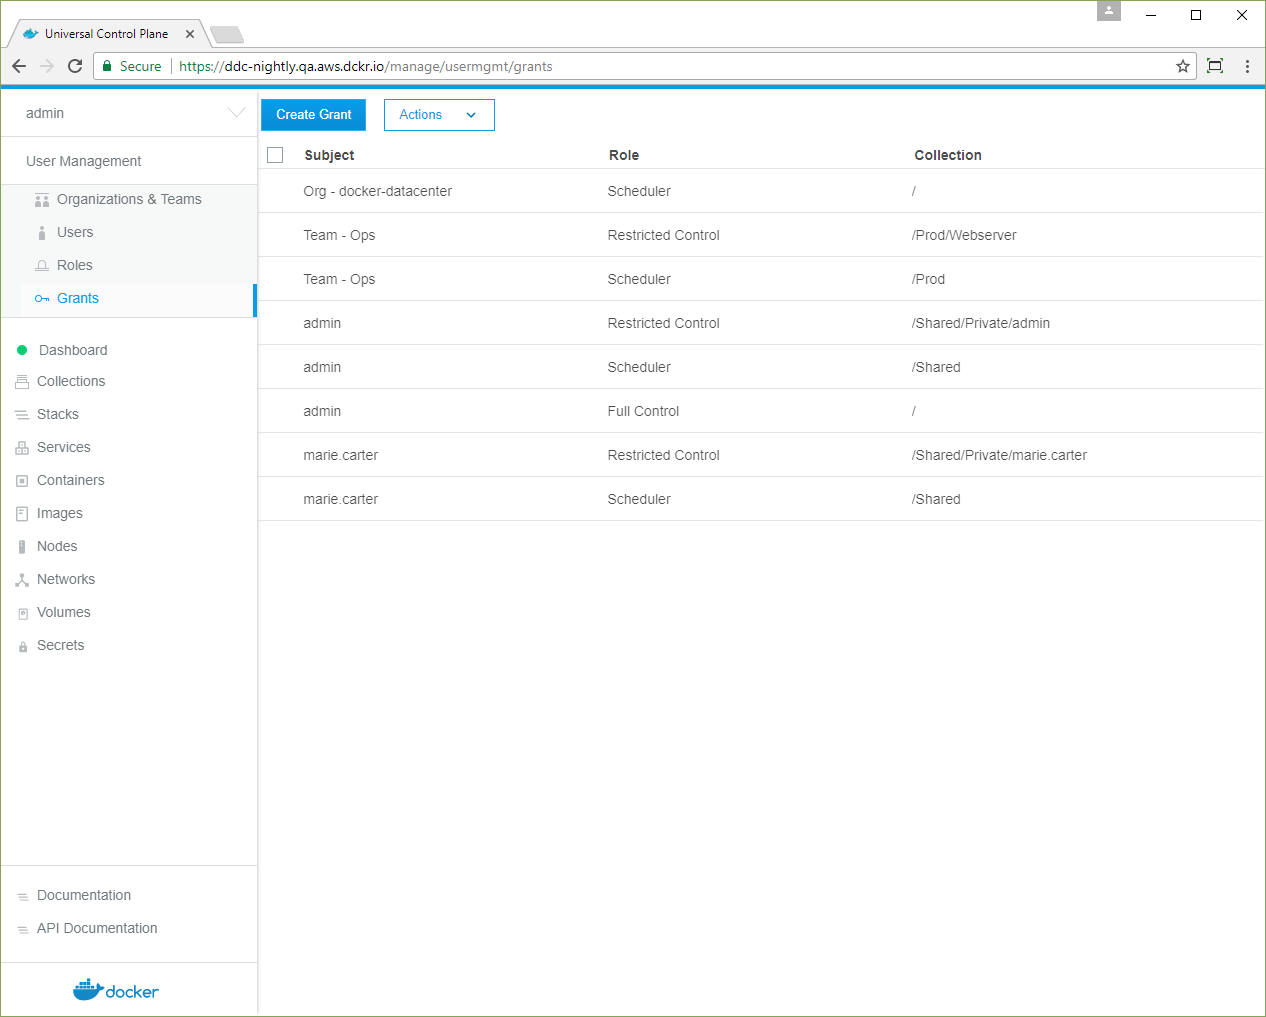
Grant access for a team
You need two grants to control access to nodes and container resources:
- Grant the
Opsteam theRestricted Controlrole for the/Prod/Webserverresources. - Grant the
Opsteam theSchedulerrole against the nodes in the/Prodcollection.
Create two grants for team access to the two collections:
- Navigate to the Grants page and click Create Grant.
- In the left pane, click Resource Sets, and in the Swarm collection, click View Children.
- In the Prod collection, click View Children.
- In the Webserver collection, click Select Collection.
- In the left pane, click Roles, and select Restricted Control in the dropdown.
- Click Subjects, and under Select subject type, click Organizations.
- Select your organization, and in the Team dropdown, select Ops.
- Click Create to grant the Ops team access to the
/Prod/Webservercollection.
The same steps apply for the nodes in the /Prod collection.
- Navigate to the Grants page and click Create Grant.
- In the left pane, click Collections, and in the Swarm collection, click View Children.
- In the Prod collection, click Select Collection.
- In the left pane, click Roles, and in the dropdown, select Scheduler.
- In the left pane, click Subjects, and under Select subject type, click Organizations.
- Select your organization, and in the Team dropdown, select Ops .
- Click Create to grant the Ops team
Scheduleraccess to the nodes in the/Prodcollection.
The cluster is set up for node isolation. Users with access to nodes in the
/Prod collection can deploy Swarm services
and Kubernetes apps, and their workloads
won’t be scheduled on nodes that aren’t in the collection.
Deploy a Swarm service as a team member
When a user deploys a Swarm service, UCP assigns its resources to the user’s default collection.
From the target collection of a resource, UCP walks up the ancestor collections
until it finds the highest ancestor that the user has Scheduler access to.
Tasks are scheduled on any nodes in the tree below this ancestor. In this example,
UCP assigns the user’s service to the /Prod/Webserver collection and schedules
tasks on nodes in the /Prod collection.
As a user on the Ops team, set your default collection to /Prod/Webserver.
- Log in as a user on the
Opsteam. - Navigate to the Collections page, and in the Prod collection, click View Children.
- In the Webserver collection, click the More Options icon and select Set to default.
Deploy a service automatically to worker nodes in the /Prod collection.
All resources are deployed under the user’s default collection,
/Prod/Webserver, and the containers are scheduled only on the nodes under
/Prod.
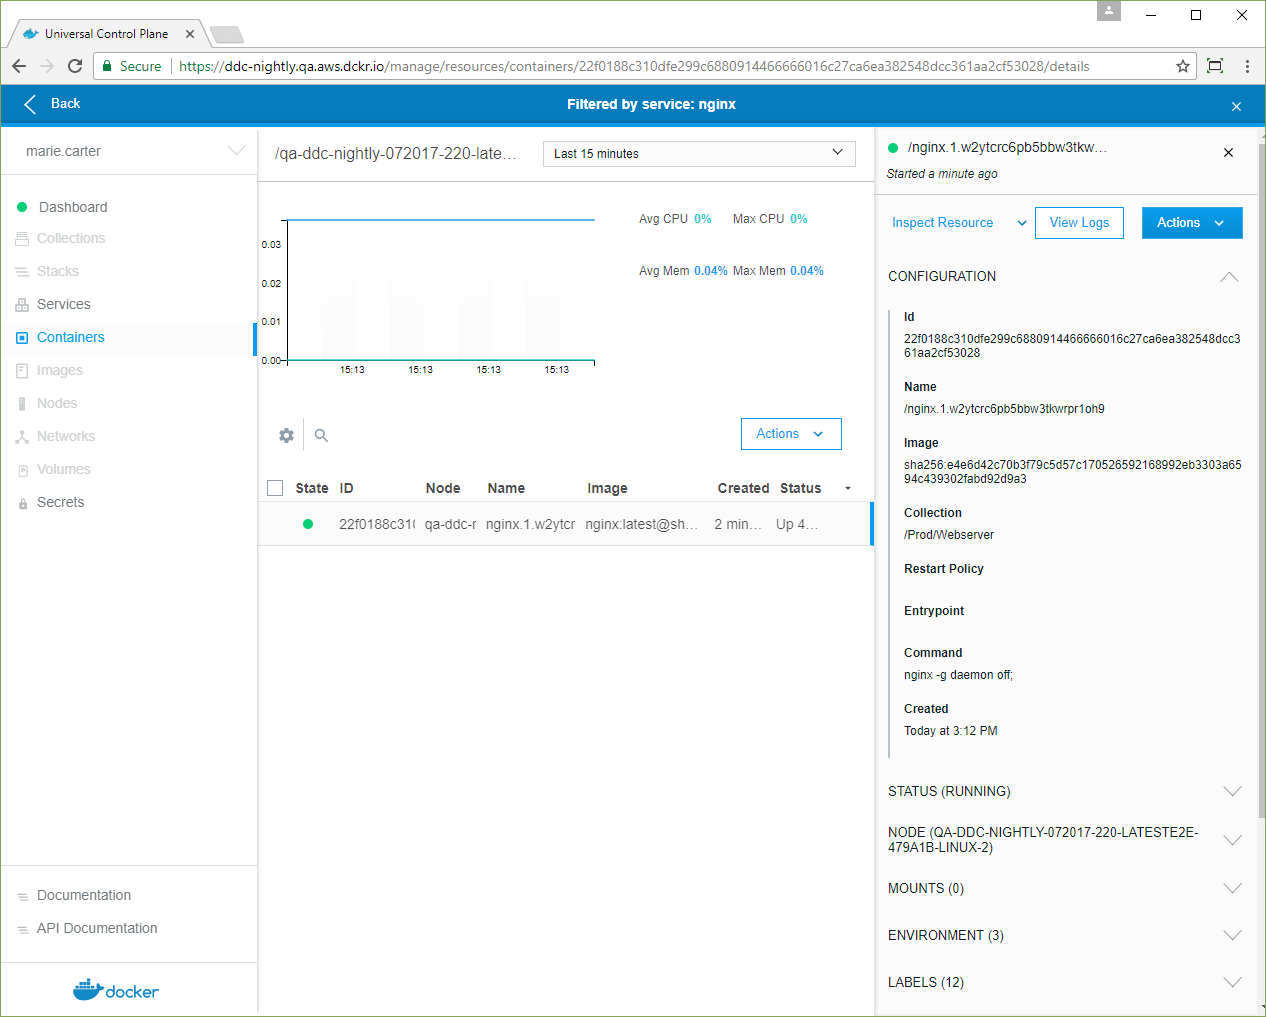
- Navigate to the Services page, and click Create Service.
- Name the service “NGINX”, use the “nginx:latest” image, and click Create.
- When the nginx service status is green, click the service. In the details view, click Inspect Resource, and in the dropdown, select Containers.
-
Click the NGINX container, and in the details pane, confirm that its Collection is /Prod/Webserver.
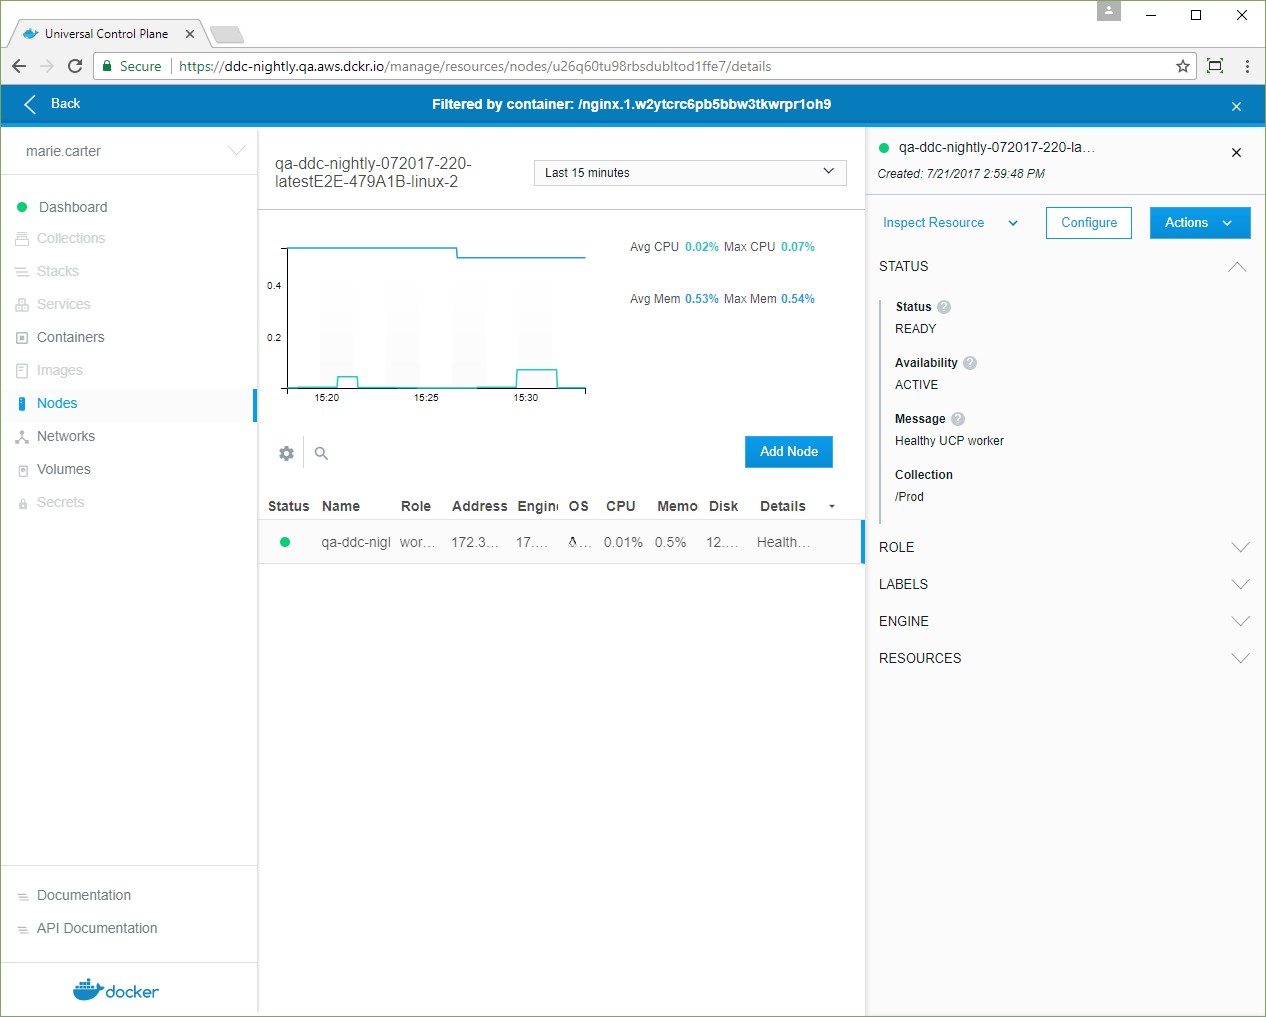
- Click Inspect Resource, and in the dropdown, select Nodes.
-
Click the node, and in the details pane, confirm that its Collection is /Prod.
Alternative: Use a grant instead of the default collection
Another approach is to use a grant instead of changing the user’s default
collection. An administrator can create a grant for a role that has the
Service Create permission against the /Prod/Webserver collection or a child
collection. In this case, the user sets the value of the service’s access label,
com.docker.ucp.access.label, to the new collection or one of its children
that has a Service Create grant for the user.
Isolating nodes to Kubernetes namespaces
Starting in Docker Enterprise Edition 2.0, you can deploy a Kubernetes workload to worker nodes, based on a Kubernetes namespace.
- Create a Kubernetes namespace.
- Create a grant for the namespace.
- Associate nodes with the namespace.
- Deploy a Kubernetes workload.
Create a Kubernetes namespace
An administrator must create a Kubernetes namespace to enable node isolation for Kubernetes workloads.
- In the left pane, click Kubernetes.
- Click Create to open the Create Kubernetes Object page.
-
In the Object YAML editor, paste the following YAML.
apiVersion: v1 kind: Namespace metadata: Name: namespace-name - Click Create to create the
namespace-namenamespace.
Grant access to the Kubernetes namespace
Create a grant to the namespace-name namespace:
-
On the Create Grant page, select Namespaces.
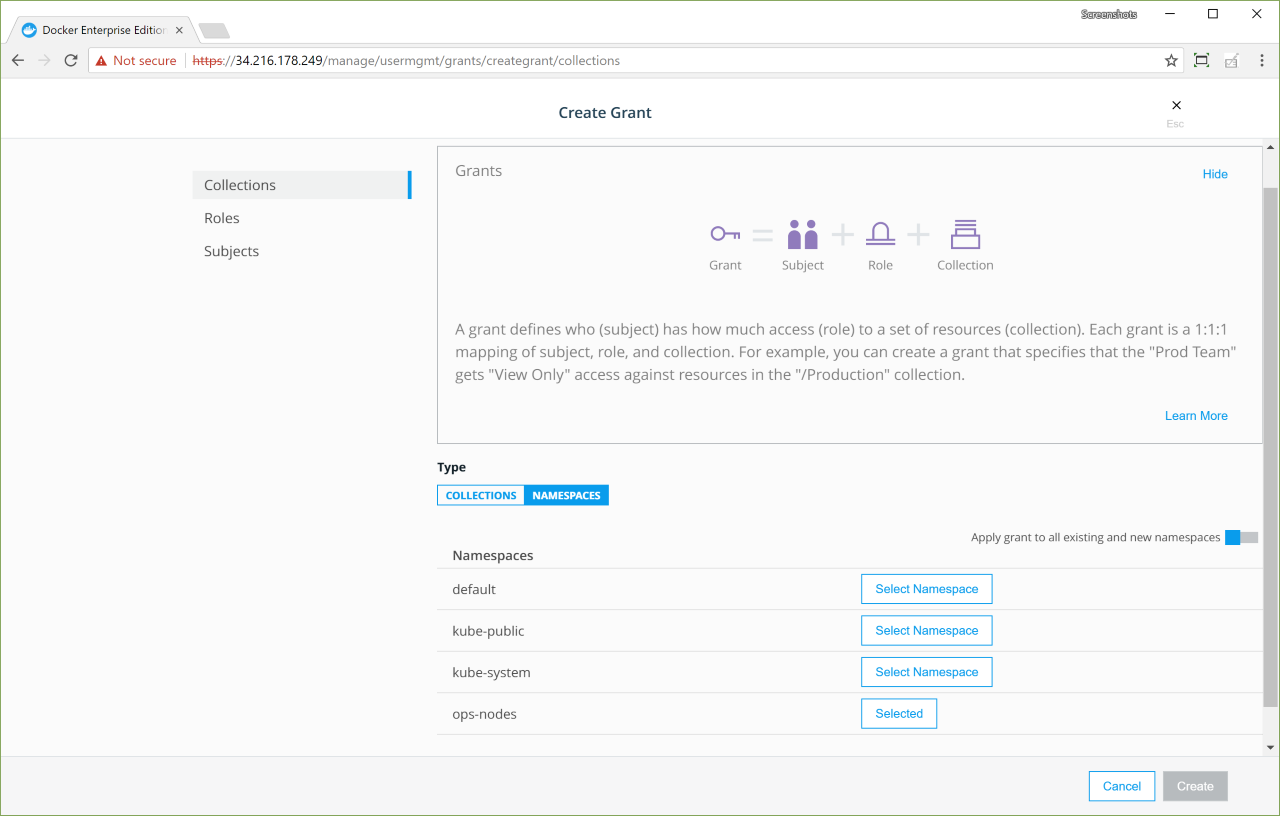
-
Select the namespace-name namespace, and create a
Full Controlgrant.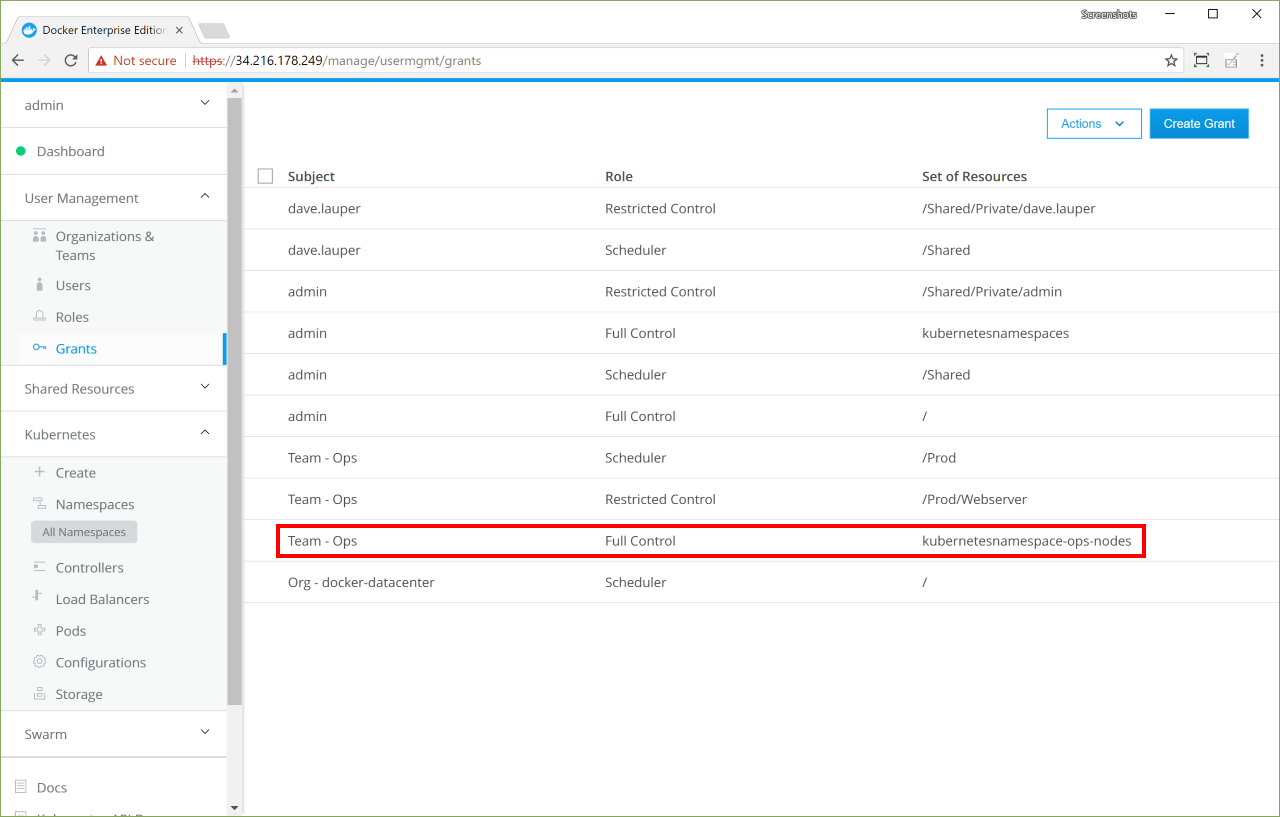
Associate nodes with the namespace
Namespaces can be associated with a node collection in either of the following ways: - Define an annotation key during namespace creation. This is described in the following paragraphs. - Provide the namespace definition information in a configuration file.
Annotation file
The scheduler.alpha.kubernetes.io/node-selector annotation key assigns node selectors to namespaces. If you define a scheduler.alpha.kubernetes.io/node-selector: name-of-node-selector annotation key when creating a namespace, all applications deployed in that namespace are pinned to the nodes with the node selector specified.
The following example labels nodes as example-zone, and adds a scheduler node selector annotation as part of the ops-nodes namespace definition:
For example, to pin all applications deployed in the ops-nodes namespace to nodes in the example-zone region:
- Label the nodes with
example-zone. -
Add an scheduler node selector annotation as part of the namespace definition.
 apiVersion: v1
     kind: Namespace
     metadata:
       annotations:
         scheduler.alpha.kubernetes.io/node-selector: zone=example-zone
       name: ops-nodes